Showing posts with label moss. Show all posts

Monday, 4 February 2013

The chocolate-box cottage

When the Mini House first arrived at Chez Pearly Jones, it was covered in brick effect paper, which for some inexplicable reason had been printed in a rather unhealthy and very un-brick like shade of bile green.

The picture does not really do the colour justice...
It is difficult to describe the exact colour, but as Mr Pearly Jones is also a designer, who has worked in the world of Pantone colours for the last 20 years, I turned to him for a second opinion.

"What colour would you say that was?" I asked,  pointing at the new arrival sitting on our dining room table.  He took one look, and with the air of a true professional said "Snot", before wandering off to watch TV.

He did have a point. The paper could have come straight out of someone's hanky, and so it had to go.

Having looked into brick slips and discounted them at an early stage due to price and my lack of patience, I realised I had to go for paper, but with something looking more like the London Stock bricks which No 1. Heatherside Corner is built with.

Having found dolls house brick paper online, it dawned on me, as I went to check-out, that I didn't actually need to buy any.  As mentioned in earlier posts, it can be very handy to be working at the family printing business. And handier still, if you remember this fact before making unnecessary purchases!

So instead, I paid a single use licence for a photograph of an old wall, from an online image bank, and then persuaded Mr PJ to run me off some sheets of it at SRA3 onto very thin card.

The basic brick image printed onto thin card for a more durable finish. 
As it was never part of the plan to make the outside of the Mini House look like the real thing, it allowed me a big dollop of artistic license when it came to the brickwork.  I have always loved those old adverts or ghost signs, which were painted on the sides of shops and houses before advertising hoardings took over.

The Mini House seemed to be the perfect canvas for a couple of my own. 

While having a loft clear-out our neighbours had unearthed an old Fry's Chocolate box and kindly lent it to me to scan.  Along with a favourite vintage image, I used Photoshop to add them both to the brick wall paper, and to make them look weathered and worn away in parts.

The inspiration found in our neighbours loft. The Mini House can now truly be described as a chocolate-box cottage!

And as it looks once "painted" on the side wall of the Mini House.

Once the Mini House was entirely covered,  I painted it with watered down acrylic in browns and a moss green to emulate the damp patches,  algae and general accumulated grime, which is in keeping with a Victorian house. Or at least, it is, in No 1. Heatherside Corner's case.
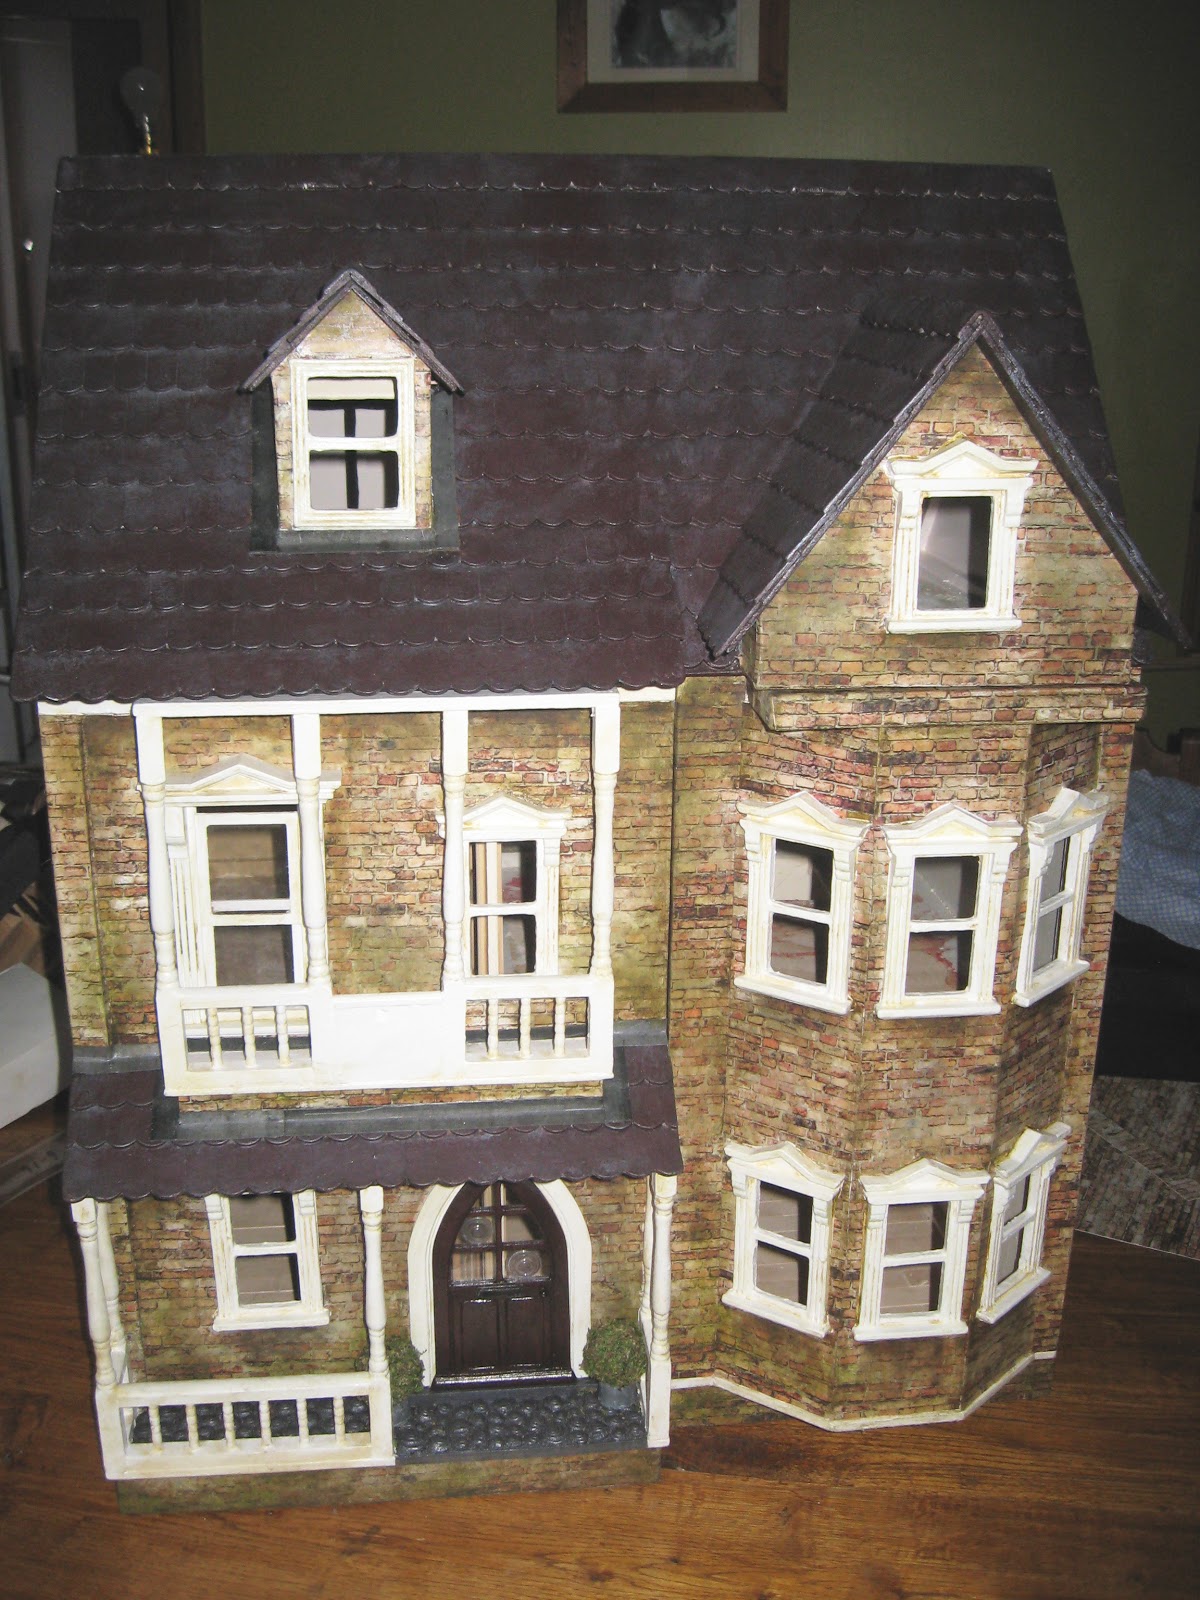


It looks a bit run-down and slightly neglected. As if it has been hidden behind a very overgrown hedge or tree for a long time... which is not so much like No 1. Heatherside Corner. 

But I'm pretty pleased with the general effect.  

And not least, because himself has finally stopped referring to it as Mucus Mansions.

Tuesday, 22 January 2013

The Shrubbery

I'm not green fingered by nature and am really quite a danger to all plant life when attempting any form of gardening. So when I had the idea a while back, of "enhancing" the approach to our real house with some topiary, I thought I would play it safe, for the plants at least.

Real front door
The not very impressive afterall "real" topiary...
Instead of buying the real thing and artistically clipping it into some whimsical shape for the amusement of all to see, I trotted to our local garden centre and purchased two, not very realistic, but user friendly, fake privet balls and popped them on top of a couple of zinc flower pots. Job done. I had myself a shrubbery! And no watering needed.

To make the same for the Mini House was not quite so simple. For a start, I didn't want to spend any money, and the only 1:12 topiary I had seen was made of resin, was very costly, and even less realistic than my plastic balls!

So, having found two smallish Christmas tree baubles and some hollow plastic pipe, I attempted to make something similar to the real(ish) thing on our doorstep.

I have "acquired" from my Father in law's paint stash, some amazing pewter spray paint, which I have already used on the roof and hearth in the Mini House. It has graphite in it, so once dry, you can buff it to a sheen with a soft cloth. It worked really well on the cut pipe to make the zinc flower pots. And to make them look water stained, I added a bit of watered down white acrylic dabbed on with my fingertip.

The shrubs themselves are made from the baubles covered in green acrylic paint mixed with sawdust and wood glue. Once dry, I coated them in another thick layer of wood glue, before rolling them in freeze dried mixed herbs from the kitchen cupboard, and more sawdust. Then a coat of matt acrylic varnish and a second layer of herbs, with an additional a sprinkling of moss picked from our neighbouring woods, which I dried and chopped into tiny fragments. Finally a few individual herb leaves were added with a spot more wood glue.

And these are the results. Not strictly in proportion but good enough I hope.

The mini version looking slightly less fake than the "real" thing


"Then, when you have found the shrubbery, you must place it here, beside this shrubbery, only slightly higher so you get a two-level effect with a little path running down the middle." Head Knight of Ni, Monty Python's Holy Grail