Wednesday, 20 February 2013

Mrs Bender's coming home!

Anyone has who read my original post explaining how the Mini House Project started, will be aware of the Bender Family; the four, small rubber folk, who lived in the dolls house belonging to my sister and I, in the early 1970's.

And who were, unbeknownst to them (with no malicious intent on our part) early practitioners of Ashtanga Yoga. That's the one where you can pick your teeth with your toenails and keep your ears warm at the same time...

In an age where most tiny inhabitants of 1970's doll's houses could only stand or lean stiffly against their furniture, the Bender Family, who consisted of Mr and Mrs Bender, and their flexible children Tommy and Sally, were ahead of their time. After all, they could put their legs behind their ears with gay abandon. However unwillingly.

Admittedly, as was mentioned in my previous post, it made the cartilage / wire inside their legs pop out of the back of their knees, but for us, as children with enquiring minds, that seemed small price to pay, for the amusement.

I never questioned at the time what the Benders actually felt about this. And perhaps it is no surprise then, that our dolls house was eventually taken away from us (well...we were 18 years old and 21 respectively), and the Benders went too.

I just assumed that they had all relocated, eventually to the Big Dolls House in the Sky. Or at least gone into hiding, to escape more devilment from other horrible, small children, who take delight in making people's legs bend the wrong way.

I never thought I'd see the day that she'd be flaunting
 herself online. Not least,  because the Internet 
hadn't been invented in her day.
But how wrong could I be? For this evening, I discovered that Mrs Bender at least, is alive and well and selling herself on the internet!

It appears, however, that Mr Bender is no longer on the scene (unless he was taking the photos) and with Tommy and Sally all grown up,  I can only surmise that, at the grand old age of 43 (86 in rubber years) she is is need of ready cash and a roof over her head.

While perusing Google this evening, I stumbled across a picture of her, sitting at a jaunty angle, in a new, blue and white polka dot frock (her old one was a respectable, dull bottle green as befitting a mother of two).  Waving like a floozie for the camera! All topped off with a new hairdo; the old one, while the same peroxide blonde, was more "Maggie Thatcher at the start of her Prime Ministerial career", circa 1979.

And wearing a slick of blue eyeshadow too!!  If only we still had the tiny bar of pink plastic soap, I would have made her wash that off, for starters.

Thinking back, it can't have been an easy life, trying to feed a family of four, on food made out of felt and glue, with no running water and sporadic mains power. When someone finds it funny, to make your head face a different direction from your feet on a regular basis.

Still got good legs for someone who has spent
most her life with them warming her ears 
It's a blessing she could sit down, poor thing. Still kept her figure though....which is more than can be said for me.

I felt a stab of pity. After all, I feel partly responsible for the position she now finds herself in. Literally.

And so, to save her from whatever degrading, unhappy, contorted life she was heading for, I paid my £3.25 including postage, to the wonderful folk at Groovycart.co.uk/collectable_dolls who have been looking after her up until now.

A sort of Dog's Trust for dolls of a certain age.

Although, how dear Mrs Bender (if it is indeed she, and not a look-alike) will feel when she finds out who has re-homed her, is anyone's guess.

She will find out soon enough, when she arrives in the post box of No1. Heatherside Corner.

But if she is reading this, in advance...

Pledge: "Dear Mrs Bender, when you arrive at the Mini House, I promise I will never, ever again, bend your legs the wrong way just to see what happens to the back of your knees."

Well....maybe just the once, for old times sake.


Disclaimer: No rubber people will be harmed at any time, during, or after, writing this blog.

A Bender is for life and not just for Twister.

N.B. Thank you to www.groovycart.co.uk/collectable_dolls for kind permission to use the above images, before she arrives safely ( I promise) at No1.Heatherside Corner. I have a lot of saying sorry to do! 

Monday, 18 February 2013

More "blemish" than "Flemish"....

Working on the Mini House Project has made me look much harder at my surroundings than I previously have done.

Although I believe I know every corner of our dusty little Victorian pile, staring at one small part of it for hours, while you try to replicate it in miniature, can throw up unexpected challenges.

For instance, I'm pretty certain in the 9 years we have lived at No1. Heatherside Corner, I must have noticed at some point, that the front door was glazed with "Flemish" patterned obscure glass. After all, I have polished it and the two round bullion panels, on numerous occasions.

And I've peered through it even more times, at countless unexpected callers, before opening the door.

I'm sure anyone on the other side must have noticed. Or at least they had hoped that the large distorted face, with googley eyes looming out of the gloom at them, was down to the pattern in the glass, and not a permanent trait of the inhabitant's countenance.

So I'm not sure why, after having finished the miniature arched door for the Mini House, that one morning as I was dragged through the real one by an eager Furball on the way to his ablutions, I was slightly surprised to notice it wasn't glazed with plain glass.

I don't know what that says about me, although I don't ever remember sewing an "Observancy" badge to the arm of my Brownie uniform, which suggests I was never awarded one, and therefore it's something of a relief to know I haven't let myself down.

But having already made the miniature door and sealed in the glazing, when this epiphany took place, I was faced with a dilemma.

How to turn the glass, already firmly in situ, with no way of removal, into "Flemish" patterned obscure glazing.

I had a few unsuccessful trials with a spare piece of window glass and various clear substances, before turning to the web for inspiration.

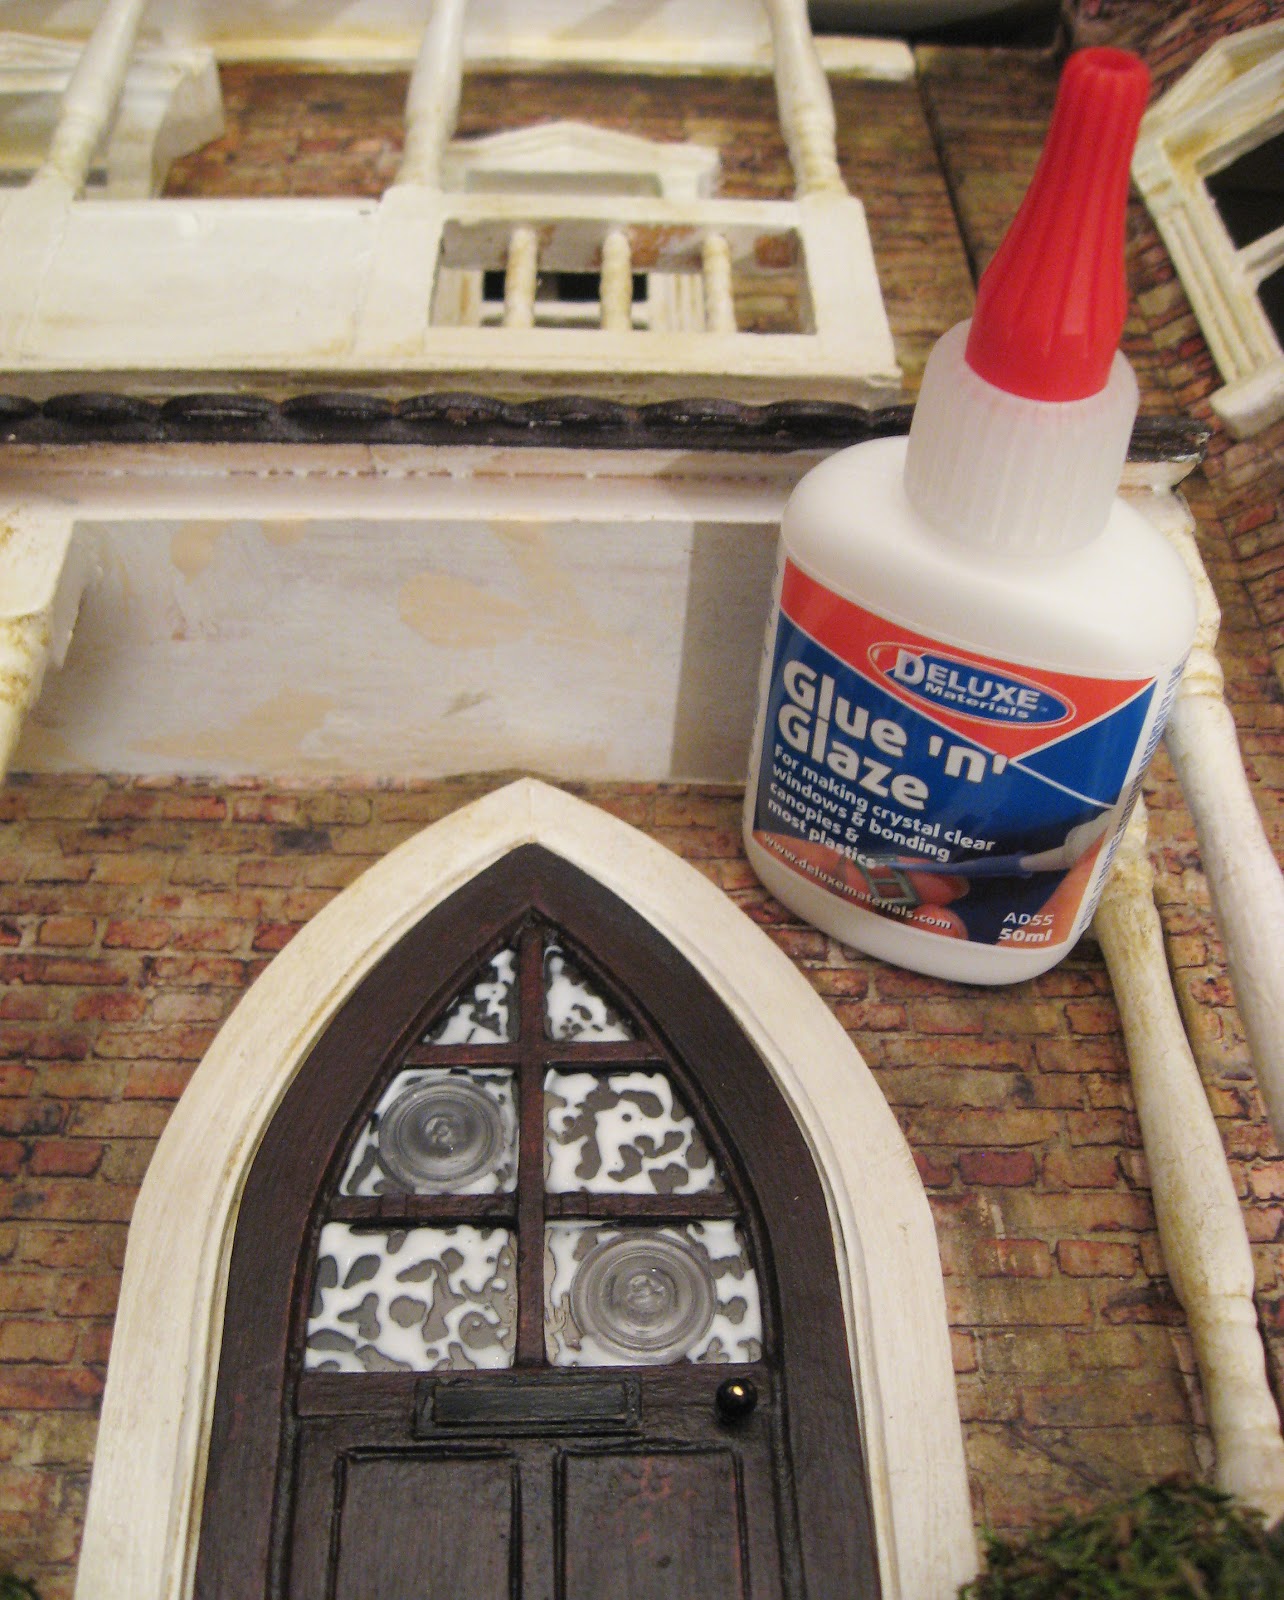
Step forward Deluxe Materials Glue 'n' Glaze, which annoyingly I could have bought in person at the City of London Dolls House Fair a couple of weeks before, had I known that 1) it existed, or 2) that I would need it a fortnight after I had trotted past their stand on my way to ogle the miniature plant stall.

That aside, after considerable research on the subject, I decided this was the stuff to save the day.

The product, designed for glazing dolls house windows, can be applied in the required thick white "gloops"- technical term*, and dries crystal clear over a period of days.

As I type, it still probably needs a couple more days to dry completely clear but the general effect is there.

Not quite "Flemish", maybe a little more "blemish".

But guaranteed to distort the tiny face of any occupant of the Mini House beyond recognition, and therefore my work here is done.

There was some trial and error on a spare piece of glass before taking the bullions by the horns
Almost dry. All that is missing is the googley-eyed face looming towards you from the other side....

From Oxford Dictionaries
gloop


Pronunciation: /gluːp/

Definition of gloop

[mass noun] informal sloppy or sticky semi-fluid matter, typically something unpleasant:


The Balcony (now) Seen

Having relegated the first attempt at a mini house for the Mini House, to a dark corner of my workbox, where out of sight is out of mind, and only dust bunnies lurk, I embarked upon the second version, with far more success.

But after sitting back to admire my efforts in a slightly self-satisfied manner, I became aware that something was missing. It still did not look quite like its big brother, the real Mini House.

The mini Mini House looked a wee bit naked. As if it had gone out in a rush and forgotten to put its trousers on.

The longer I stared at it, and the longer it stared back at me, blushing and trying to cover its modesty with a roofing slate, I realised, it really needed a balcony, and not just a suggestion of one.

So having discounted a number of small parts, such as mobile phone innards, an eyebrow comb, a cable tie, and other random detritus, in the search for something suitably spindle-like to customise as veranda rails, a final rummage through the drinks cabinet came up trumps.

Cocktail sticks! Ta dah!

A bit chunky perhaps. And probably too thick to let much light "through yonder window break", had it been attached to Chez Capulet, the house of Shakespeare's tragic balcony aficionado Juliet.

But it's not. It's attached to the mini Mini House.

And I don't care about the light, I'm never going to be on the inside, looking out.

Ready for its balcony scene...


Sunday, 10 February 2013

If at first you don't succeed....

I was told this week by a close relative, in a jokey manner, that I "need to get a life". It was just after he'd signed for a parcel in my name and, being keen to know what was inside (a fact, in itself, which suggests he should take his own advice), he watched while I opened it.

It appears that he doesn't share my enthusiasm for the Mini House Project, or for the fascinating world of miniatures opening up in front of me.

But he is obsessed with cricket. I rest my case.

Copyright: Minimum World / Streets Ahead
The same model as the new arrival
The parcel in question contained a tiny dolls house from Minimum World,  made by Streets Ahead. It is a replacement for the wonderful handmade miniature dolls house that I inadvertently turned into Frankenstein's Monster last Sunday. And which is now safely back in its box, awaiting a full structural report to survey the damage done, on the advice of the talented and very kind members of the Dolls House Emporium forum, which I recently joined. 

But meanwhile, I was still itching to make a mini house for the Mini House. Hence the arrival of Mini House II - The Sequel, at No.1 Heatherside Corner.  

This time I played it safe and bought a cheap factory produced model. But one with potential. One that, if anything went wrong (again), could be popped on the sitting room fire as kindling, without a trace of guilt.... 

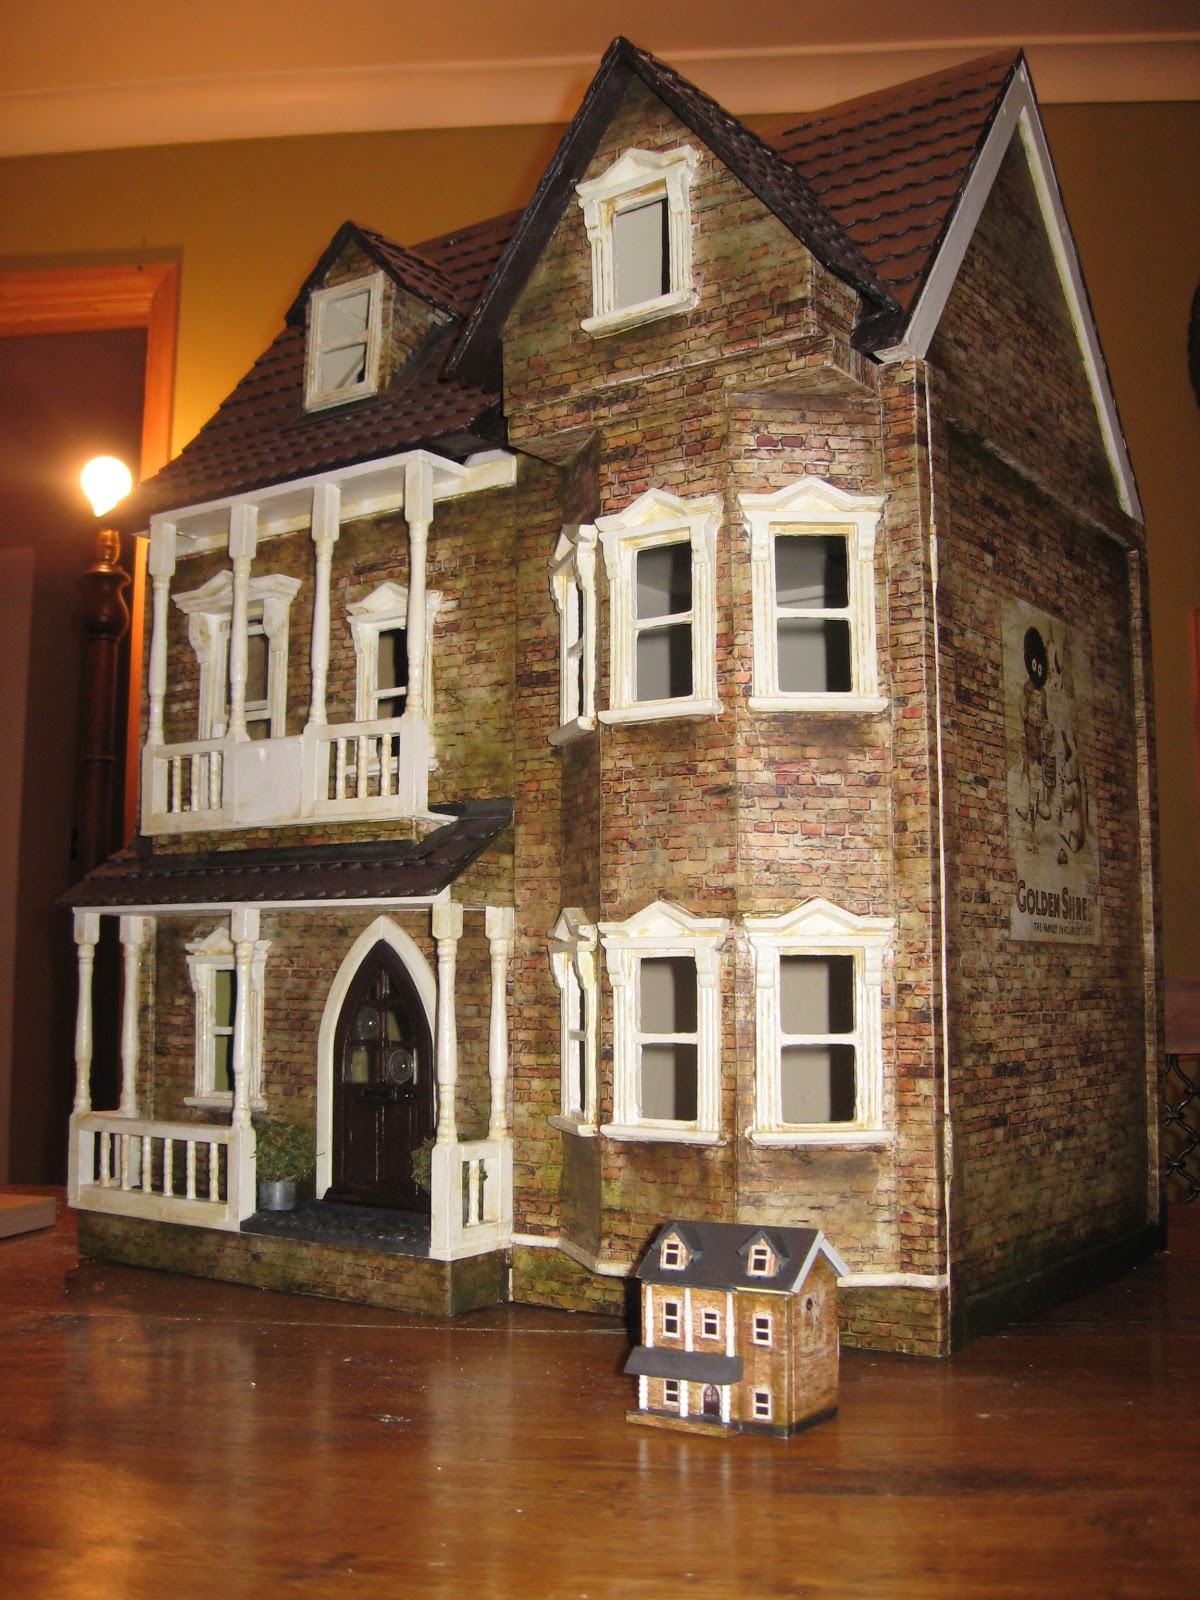
And this is the result. 

Tonight Mr PJ will have to don a woolly hat and another pair of socks, as the fire will stay unlit for now....

Not an exact copy but a miniature nod to the Mini House


"If at first you don't succeed, try, try again. Then quit. There's no point in being a damn fool about it." W.C. Fields.

Monday, 4 February 2013

The chocolate-box cottage

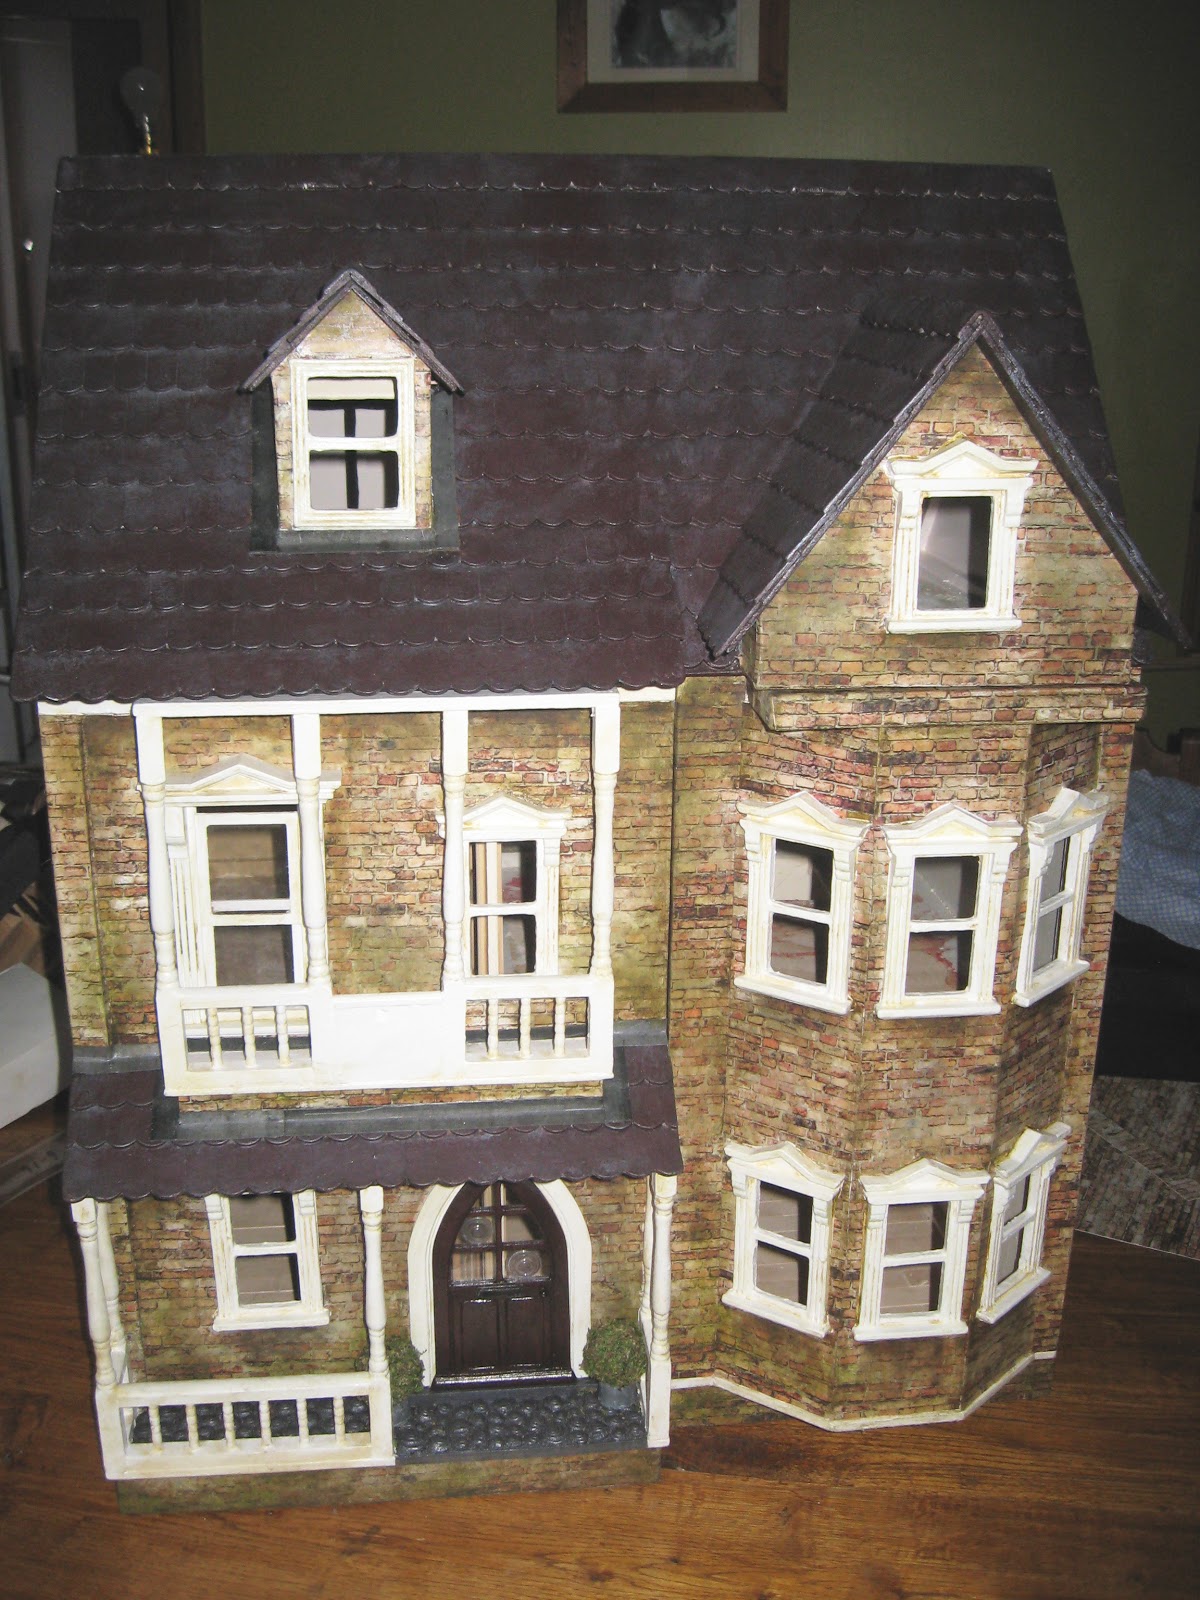
When the Mini House first arrived at Chez Pearly Jones, it was covered in brick effect paper, which for some inexplicable reason had been printed in a rather unhealthy and very un-brick like shade of bile green.

The picture does not really do the colour justice...
It is difficult to describe the exact colour, but as Mr Pearly Jones is also a designer, who has worked in the world of Pantone colours for the last 20 years, I turned to him for a second opinion.

"What colour would you say that was?" I asked,  pointing at the new arrival sitting on our dining room table.  He took one look, and with the air of a true professional said "Snot", before wandering off to watch TV.

He did have a point. The paper could have come straight out of someone's hanky, and so it had to go.

Having looked into brick slips and discounted them at an early stage due to price and my lack of patience, I realised I had to go for paper, but with something looking more like the London Stock bricks which No 1. Heatherside Corner is built with.

Having found dolls house brick paper online, it dawned on me, as I went to check-out, that I didn't actually need to buy any.  As mentioned in earlier posts, it can be very handy to be working at the family printing business. And handier still, if you remember this fact before making unnecessary purchases!

So instead, I paid a single use licence for a photograph of an old wall, from an online image bank, and then persuaded Mr PJ to run me off some sheets of it at SRA3 onto very thin card.

The basic brick image printed onto thin card for a more durable finish. 
As it was never part of the plan to make the outside of the Mini House look like the real thing, it allowed me a big dollop of artistic license when it came to the brickwork.  I have always loved those old adverts or ghost signs, which were painted on the sides of shops and houses before advertising hoardings took over.

The Mini House seemed to be the perfect canvas for a couple of my own. 

While having a loft clear-out our neighbours had unearthed an old Fry's Chocolate box and kindly lent it to me to scan.  Along with a favourite vintage image, I used Photoshop to add them both to the brick wall paper, and to make them look weathered and worn away in parts.

The inspiration found in our neighbours loft. The Mini House can now truly be described as a chocolate-box cottage!

And as it looks once "painted" on the side wall of the Mini House.

Once the Mini House was entirely covered,  I painted it with watered down acrylic in browns and a moss green to emulate the damp patches,  algae and general accumulated grime, which is in keeping with a Victorian house. Or at least, it is, in No 1. Heatherside Corner's case.


It looks a bit run-down and slightly neglected. As if it has been hidden behind a very overgrown hedge or tree for a long time... which is not so much like No 1. Heatherside Corner. 

But I'm pretty pleased with the general effect.  

And not least, because himself has finally stopped referring to it as Mucus Mansions.

Sunday, 3 February 2013

The mini House of Frankenstein

Just when it was all going so swimmingly, I have had my first disaster. 

Having received some very positive and lovely comments (for which I thank you) regarding the start of my quest to turn the junk shop house into No 1. Heatherside Corner, I may have allowed myself to become a little smug about the tiny achievements I have had so far.  The sawing, clamping, glueing, painting and sanding have progressed well. My creation is a success so far.... [Cue mad laugh]

To counteract this, and to put me firmly back in my amateur place,  The Mini House Project has bared its teeth and bitten me firmly on the behind. I have wasted a whole day and in the process, have pretty much ruined the beautifully crafted, tiny dolls house by Jacqueline Crosby Miniatures, which I purchased from the City of London Dolls House Festival last weekend. 


In my over-enthusiasm to "Mini Houseify" everything, I thought it would be a good idea to turn the handmade, wooden miniature dolls house I bought, into a tiny version of the slightly bigger thing. Instead of leaving well alone.

Well now the damage is done (apologies in advance to Ms Crosby). 
A similar house to mine, by Jacqueline Crosby Miniatures, 
but one that has escaped being Minihouseified...

I have created a monster. Complete with scars, stitch marks and copious amounts of glue. Having not only sawed bits off it, printed, and then firmly glued on sheets of replica, only smaller, brickwork, I decided to make matters worse by trying to add badly made cardboard window frames. 

But not, sadly, before prising off all the original and perfectly formed window sills and chimneys with my little scalpel, with a view to re-gluing them once my "work here was done". 


And then, to put the icing on the already sinking cake, I attempted to paint it with acrylic, in bad light, while wearing my old reading glasses (the lenses of which are only marginally thinner than the bottom of milk bottles).


It has not gone well. 


The Bride of Mini House's best side - believe me, you don't want to see what the other side looks like.... 
The condemned signs are up. And I don't think I can soak the glue and paper off the poor tiny monstrosity, to return it to its former self. It is "subject to demolition".  I have put it back in its box for now, and am considering burying it later in the back garden, with a few well chosen words to mark it's passing. 

The Lesson has been learned.  Never try to run before you can walk. And never, ever, run with scissors.

"Learn from me, if not by my precepts, at least by my example, how dangerous is the acquirement of knowledge, and how much happier that man is who believes his native town to be his world, than he who aspires to become greater than his nature will allow." Mary Shelley - Frankenstein.

But onwards and upwards.


The Mini House Project continues. It's all a learning curve afterall.

The trials and tribulations of turning a junk-shop dolls house into No 1. Heatherside Corner .....

Monday, 28 January 2013

The Wisteria Challenge


Yesterday I visited the City of London Dolls House Festival.  I’ve never been to a dolls house fair before and had no idea what to expect. Never in my life, have I seen quite so many people, peering quite so hard, at objects that are quite so small, yet perfectly formed! 

The standard of the exhibitor’s creations certainly put my own little efforts to shame.  I tried not to think about the decidedly wonky, glue and sawdust encrusted handiwork, squatting on our dining room table at home, as I skulked sheepishly around the fair, sure that they’d be able to spot the imposter who did not belong in their world.

But rather than tar and feather me with miniature handcrafted plumage, they seemed happy to let me browse. And so I managed to overcome my awe, long enough to make a few modest purchases, including some lovely handmade turquoise glass bottles and an oil lamp from Ray Storey Lighting who even kindly wired the lamp for me.

I have always dreamed of owning a wisteria and last year our neighbours presented us with one, so I’ve been looking for a tiny one, or a way of making one, to add to the mini house. 

I’m pleased to say the search is over. I found one at the Festival, in the form of a wonderful, if somewhat challenging, kit made by Georgina Steeds at The Miniature Garden Centre. 

In kit form ready to be transformed into a thing of beauty and a joy to behold forever.....
It comes with full instructions and four little bags containing all the miniscule parts required to create a very realistic plant.

Sadly for me, it is not supplied with little bags full of the expertise or patience I am going to need, to turn it into a Wisteria anywhere near as fabulous as the one they had on display.  Nor does it come with a spare pair of eyeballs for when mine become so crossed they need replacing.

But I’m up for the challenge.  I just hope I am up to the job.  I don't think I could cope with having my a*** whooped by a plant.

Image copyright: The Miniature Garden Centre
The finished product as made by Georgina Steeds at The Miniature Garden Centre.
Image copyright: The Miniature Garden Centre
I can only live in hope mine will look half as good as this once completed.
Image copyright: The Miniature Garden Centre

Having left Mr PJ waiting for me outside the Festival, afterwards we took a stroll along the Thames Path to the Captain Kidd in Wapping, where I showed him what I had bought.  Including a tiny wooden dolls house by Jacqueline Crosby Miniatures….

He rolled his eyes and asked if that meant I will now need a mini house, for the mini house’s mini house.  He has a point.

Wednesday, 23 January 2013

Jurassic Parquet....

I'm a bit obsessed with fossil hunting.  Sadly, I know next to nothing about the actual things I find, apart from the fact that, one, they all crawled, swam, or generally bobbed about on our planet, two, they are all very, very old, and three, some of them should never have been hit with my little yellow fossil hammer.

A trip along the Jurassic coastline at my favourite holiday destination of Whitby in North Yorkshire, always ends with my handbag being weighed down with enough "seaside rock" to pave a municipal carpark. And none of it tastes of mint or is phallus-shaped. Well, belemnites being the exception to the rule.

The ones that have survived my eager hammering in the hope they will spring open to reveal the ultimate ammonite, are safe and sound at home in a big wooden box.  The ones that didn't, are lying in tiny shattered pieces along the coast. I apologise in advance for my small part in North East Yorkshire's coastal erosion.

Conservation issues aside, imagine my excitement when a trip to a local stone mason for some sandstone for our back garden, uncovered a pile of large fossil paving slabs. Not real, sadly, but "fossilly" enough to have me loading up as many as the old Saab's suspension could cope with, before crawling back home up the A30, with the exhaust dragging on the ground.

Once at No. 1 Heatherside Corner, they were installed with enthusiasm in our tiny front garden, before being brushed with wood stain and embedded with grit, to make them look more realistic.

We are in good company, I believe these have been installed at the Eden Project too 
The Mini House doesn't really have a front garden, it has a veranda. But seeing as the fossil slabs are inches away from the real front door, it only seemed right and proper that the Jurassic Coast should come to the Mini House too.

Having (somewhat unsurprisingly, it has to be said), unsuccessfully scoured the web for "dolls house fossil paving slabs", followed by "tiny fossil tiles" I decided I'd resort to the Fimo polymer clay in the loft,  left over from another project.

Only one slight snag. It was bright pink.

I spent three hours after work one evening, rolling up tiny clay balls, then pressing them into the centre of a real (and all in one piece) ammonite, that is set into a large chunk of rock, which my other half bought for my birthday.

Not totally ideal, as they are imprints, not the actual concave shape, but as near as dammit. And more worryingly, the birthday present fossil has been left with a slight candy floss hue, which I'm hoping lovely husband doesn't notice, as even a surreptitious scrubbing with a tooth brush didn't dislodge the last few remnants of cerise Fimo from its crevices...

After baking the tiny, and literally "hot pink", ammonites, I glued them all to a card template, with lashings of wood glue, before sprinkling coarse ground black pepper in the gaps, as gravel, then spraying with, yes, you've guessed it, more of my trusty pewter spray paint, with a dry brush of copper acrylic over the top.

After a bit of a buff with a soft cloth, I think they look rather dandy. However, once the rest of the Mini House is completed I might add more gravel (black pepper) and a few leaves (mixed herbs) to make it look more weather beaten.

And maybe, a small, hopeful figure, in an anorak, with its yellow fossil hammer raised in the air.....

The fossil path takes on a slightly more cobbled appearance than its real counterpart, for now.